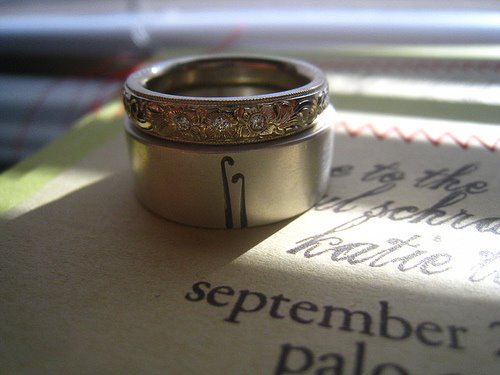
I added my own blog to my Google reader today to see how it looks there, and Google says that there are over 200 people subscribed to this blog. Really? Are there 200 of you out there hiding, not commenting, reading about my wedding?!
That makes me feel kinda shy.
Love,
Katie
Monday, March 2, 2009

Friday, February 27, 2009
DIY: Polaroid Photobooth
Like many who have come before us, we really wanted a photobooth at our wedding. But, the cost of renting a "real" booth was far too high, so we went diy.
 We wanted people to take pictures for us to keep, but also be able to take some home, so we decided to go the Polaroid route. We already had the camera (we found it by the side of the road, in a junk pile, right after we started dating).

 Of course this came right around when they decided to take the film off the market, so the price of Polaroid film shot way up. We bought some of the film before the crisis, but we ended up scavenging eBay for most of it. All in all I believe we purchased around 200 shots worth of film for 100 people (we didn't use all of it). I've also heard that Fuji is now making Polaroid 600 film, so that should make it easier for those of you who want to try this.
 While some people have a designated picture taker, we knew our friends would be all over taking Polaroids so we figured they could switch off being picture taker and model. That worked out just fine and the booth was literally full all day while people were setting up, all night, and into the next day as we were cleaning up!
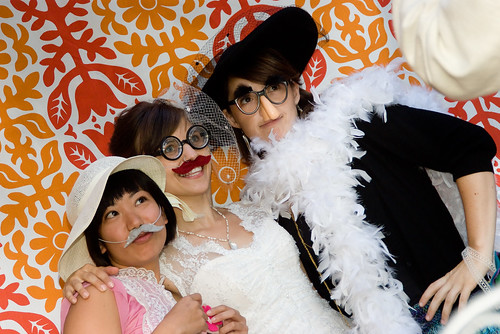
 To make the backdrop for the photobooth we purchased two sheets of fabric (three yards of each). One was a regular sized fabric, and the other was upholstery fabric from Ikea. I'd recommend upholstery fabric because the heavier weight hangs better and the extended width allows more people to stand in front of it.

 To our advantage, we were able to just tack our fabric to my parent's deck and use their porch lights to light it. You could also make a wood frame to attach the fabric to, hang a line from trees and attach the fabric to that, or nail it to a wall.
 On the deck we put a table with the film, a board for people to post pictures on, and several costume items. For the costumes we used things I had lying around my house, plus a few purchased pairs of crazy $1 glasses. And yes, I have hats and fur coats and eye patches just lying around. The felt mustaches I made.
 And of course, as some of these pictures exhibit, our photographer couldn't help but snap a few pictures of people using the booth as well. They loved it!

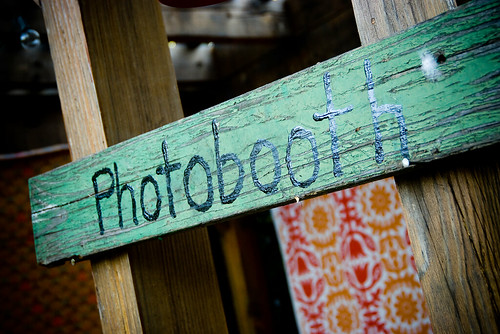 We wanted people to take pictures for us to keep, but also be able to take some home, so we decided to go the Polaroid route. We already had the camera (we found it by the side of the road, in a junk pile, right after we started dating).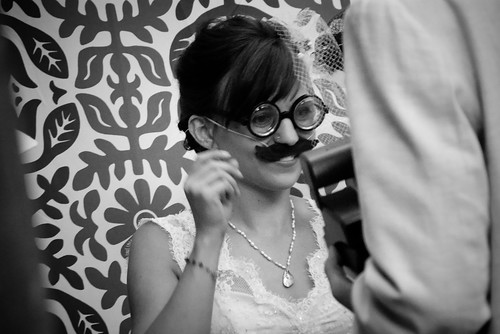
 Of course this came right around when they decided to take the film off the market, so the price of Polaroid film shot way up. We bought some of the film before the crisis, but we ended up scavenging eBay for most of it. All in all I believe we purchased around 200 shots worth of film for 100 people (we didn't use all of it). I've also heard that Fuji is now making Polaroid 600 film, so that should make it easier for those of you who want to try this.
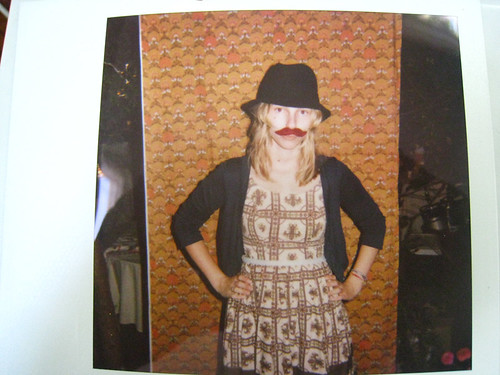 While some people have a designated picture taker, we knew our friends would be all over taking Polaroids so we figured they could switch off being picture taker and model. That worked out just fine and the booth was literally full all day while people were setting up, all night, and into the next day as we were cleaning up!
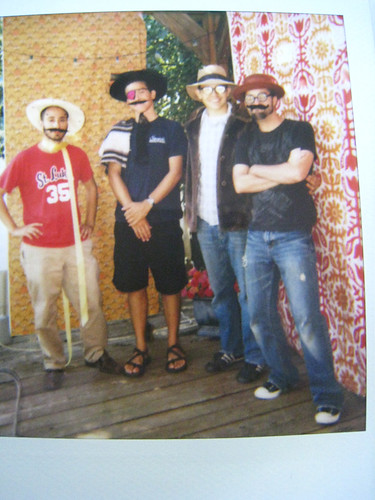 To make the backdrop for the photobooth we purchased two sheets of fabric (three yards of each). One was a regular sized fabric, and the other was upholstery fabric from Ikea. I'd recommend upholstery fabric because the heavier weight hangs better and the extended width allows more people to stand in front of it.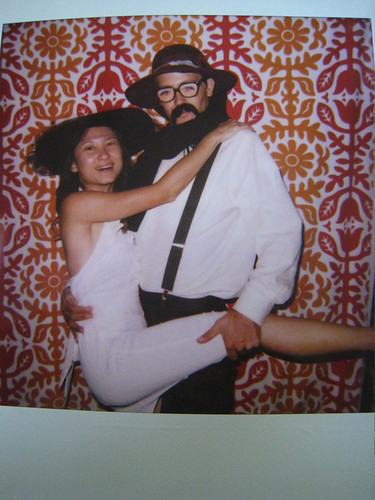
 To our advantage, we were able to just tack our fabric to my parent's deck and use their porch lights to light it. You could also make a wood frame to attach the fabric to, hang a line from trees and attach the fabric to that, or nail it to a wall.
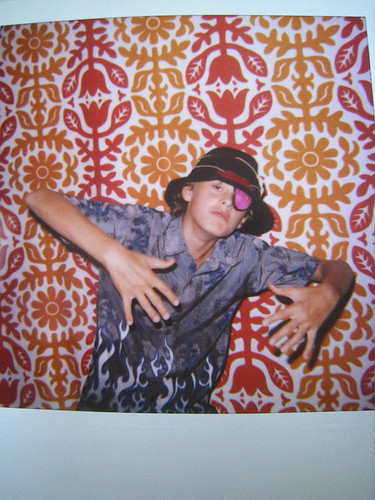 On the deck we put a table with the film, a board for people to post pictures on, and several costume items. For the costumes we used things I had lying around my house, plus a few purchased pairs of crazy $1 glasses. And yes, I have hats and fur coats and eye patches just lying around. The felt mustaches I made.
  And of course, as some of these pictures exhibit, our photographer couldn't help but snap a few pictures of people using the booth as well. They loved it!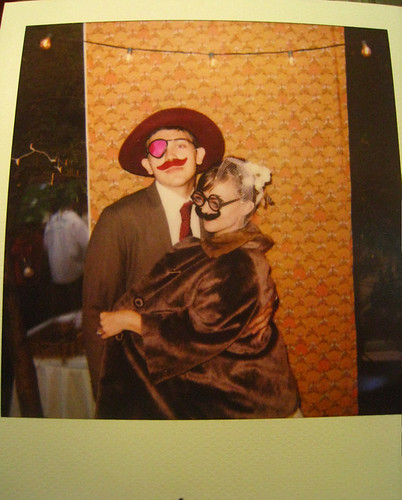
Thursday, February 26, 2009
DIY: Gocco Invitations
How did I not write about our invitations? Perhaps I blocked them out because they were so. much work. After they left my house I was happy to have them out of sight, out of mind.

Our invites were entirely designed and created by little ol' me (using purchased art...I'm not an artist!). P. bought me a gocco for my birthday so the invites were really my first project using the gocco. I highly recommend practicing a bit more before you create your invites. The gocco isn't hard to use once you get the hang of it, but we burned through several frames and lots o' ink before we figured out how to burn the screens to create clean, crisp pictures on the other side.
 Gocco, straight out of the box, with computer tutorial.

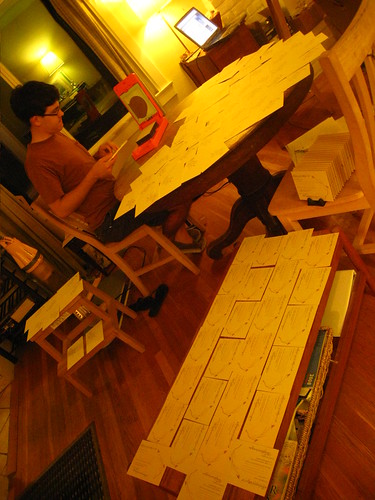
Our invites were entirely designed and created by little ol' me (using purchased art...I'm not an artist!). P. bought me a gocco for my birthday so the invites were really my first project using the gocco. I highly recommend practicing a bit more before you create your invites. The gocco isn't hard to use once you get the hang of it, but we burned through several frames and lots o' ink before we figured out how to burn the screens to create clean, crisp pictures on the other side.
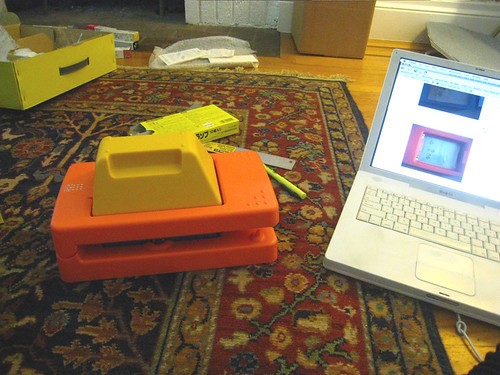 Gocco, straight out of the box, with computer tutorial.
There were papers everywhere. Everywhere.
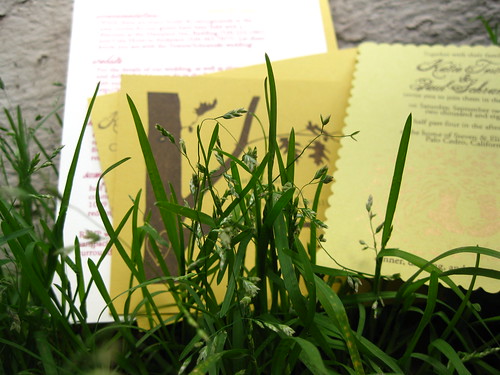
Our invitations had four components. The actual invite, the response card, an info sheet, and the envelope.This image is probably the closest to the actual color of the paper (which came from Paper Source). For the envelope I handwrote a screen using the gocco pen and then printed them so we wouldn't have to handwrite a return address on each envelope. As a sidenote, we no longer live at that address so good luck stalking me there :)
 While I wanted to use vintage stamps, that ended up being a cost that I couldn't justify. My way of getting around using the flag stamps (the only stamps available when I was sending out invites), was to use a variety of smaller amount stamps. This involved running around to four post offices who looked at me like I was a crazy person for buying hundreds of 5cent stamps.
 Our invitations were simple, using an image from Nikki McClure, one of my absolute favorite artists. The text is in a dark brown color, with gold ink for the image.
Our info cards used two screens: one for the image done in gold ink and another for the text, done in a raspberry color. We intended to have driving directions on the back of this sheet, but for some reason could not get the screen to print clearly so after several ruined screens we just scrapped the idea and stuck directions on the website.
 You may notice that on our reply card we didn't really make it clear that people should still write their name if they weren't planning on attending. Several people responded with "no" responses and no names. We had to guess based on postage and process of elimination who those people were. Kind of a pain.
 So all in all I really liked how they turned out. They aren't professional. They aren't letter pressed. But they were fairly cheap. For save the dates, all the gocco supplies, paper, and stamps we spent a total of $310.
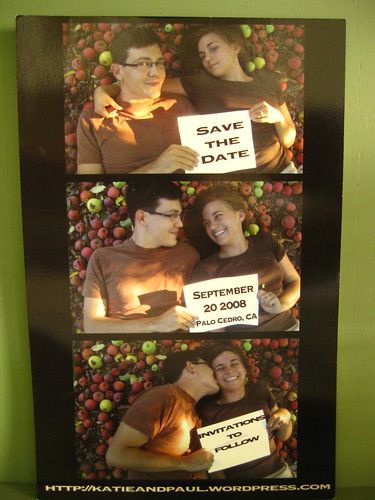
And, since I'm sure someone will ask, here is our save the date. We made my sister take the pictures of us lying under my parent's apple trees holding blank pieces of paper, but wouldn't tell her why. She thought we were crazy. I added in the text after the fact. We printed them using VistaPrint, with a discount code, and I think we paid around $15 total.

Thanks for all the questions! Keep them coming!
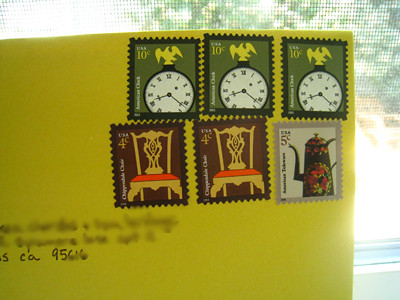 While I wanted to use vintage stamps, that ended up being a cost that I couldn't justify. My way of getting around using the flag stamps (the only stamps available when I was sending out invites), was to use a variety of smaller amount stamps. This involved running around to four post offices who looked at me like I was a crazy person for buying hundreds of 5cent stamps.
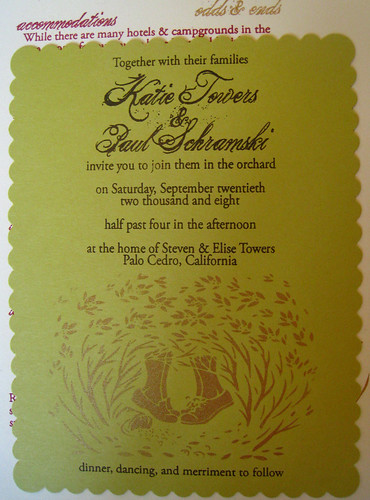 Our invitations were simple, using an image from Nikki McClure, one of my absolute favorite artists. The text is in a dark brown color, with gold ink for the image.
Our info cards used two screens: one for the image done in gold ink and another for the text, done in a raspberry color. We intended to have driving directions on the back of this sheet, but for some reason could not get the screen to print clearly so after several ruined screens we just scrapped the idea and stuck directions on the website.
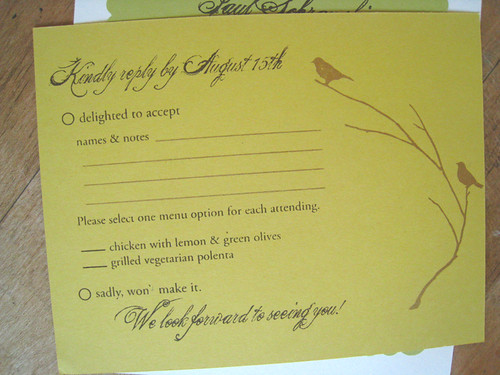 You may notice that on our reply card we didn't really make it clear that people should still write their name if they weren't planning on attending. Several people responded with "no" responses and no names. We had to guess based on postage and process of elimination who those people were. Kind of a pain.
 So all in all I really liked how they turned out. They aren't professional. They aren't letter pressed. But they were fairly cheap. For save the dates, all the gocco supplies, paper, and stamps we spent a total of $310.
And, since I'm sure someone will ask, here is our save the date. We made my sister take the pictures of us lying under my parent's apple trees holding blank pieces of paper, but wouldn't tell her why. She thought we were crazy. I added in the text after the fact. We printed them using VistaPrint, with a discount code, and I think we paid around $15 total.
Thanks for all the questions! Keep them coming!
Wednesday, February 25, 2009
BYOB Drinks
A few people have asked about what we did for drinks, so y'all get another post. Actually, you can keep having posts if you keep asking questions! Ask and you shall receive.
 Since we were not hiring someone to watch the drinks, we didn't want to make them too complicated. We decided to do bottled drinks for non-booze drinkers, and beer, wine, and one special drink for those who wanted to get a bit crazier.
We actually had plans to use wine we'd made ourselves for the wedding. They even had cute, custom labels just for us, but it wasn't quite done in time. We put a few bottles out, but they are pretty horrid and headache inducing. So instead we made a last minute run to Trader Joe's where we picked up four cases of red wine and one case of white. We didn't do the Two Buck stuff, although I don't think it's a bad option if your guests don't really care about wine. Ours were all around $5-7/bottle, which seems to buy you decent wine if you are on a budget.
We had a few people bring their own, fancier bottles of wine to share at their tables. Our table had a few bottles of expensive wine that I'd saved for the wedding, though we also ended up drinking some of the cheap TJ's stuff (it wasn't bad).
The rest of the wine was set up on our drinks table, with all the cups and a few bottle openers. The kegs were in buckets next to the table (we had two pony kegs of local microbrews), and the non-alcoholic drinks were in a steel bucket on the ground next to the table as well.
 For our extra drink we made vodka spiked sangria. All of our friends are big sangria drinkers so we knew it would go over well. Plus it's incredible easy to make. We threw several of the big juice bottles from Trader Joe's into a punch bowl with boxed wine, several glugs of vodka, and some frozen fruit. There was no particular science to it. One of my brideswomen made it pre-ceremony by tasting it as she went along until it seemed right. I did do some research before buying the boxed wine to find the good stuff.
 For non-alocholic drinks we accompanied my mom and her CostCo card to CostCo to buy bulk Mexican Cokes, sparkling water, and Izze sparkling juices.
 We also did regular and decaf coffee with dinner which we made in two regular drip coffee makers (my parent's and a borrowed one) and then put in the pretty press pots seen in the far corner of the picture below.
 You can see in this picture that we had a box under the table for people to put empties in for later recycling. For the most part people were good about keeping the table clean, putting empty bottles down below, and generally keeping things nice.
Any other questions about drinks? Let me know!
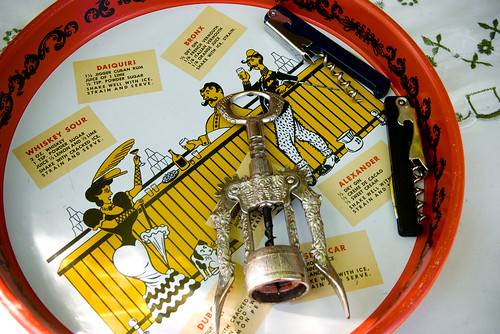 Since we were not hiring someone to watch the drinks, we didn't want to make them too complicated. We decided to do bottled drinks for non-booze drinkers, and beer, wine, and one special drink for those who wanted to get a bit crazier.
We actually had plans to use wine we'd made ourselves for the wedding. They even had cute, custom labels just for us, but it wasn't quite done in time. We put a few bottles out, but they are pretty horrid and headache inducing. So instead we made a last minute run to Trader Joe's where we picked up four cases of red wine and one case of white. We didn't do the Two Buck stuff, although I don't think it's a bad option if your guests don't really care about wine. Ours were all around $5-7/bottle, which seems to buy you decent wine if you are on a budget.
We had a few people bring their own, fancier bottles of wine to share at their tables. Our table had a few bottles of expensive wine that I'd saved for the wedding, though we also ended up drinking some of the cheap TJ's stuff (it wasn't bad).
The rest of the wine was set up on our drinks table, with all the cups and a few bottle openers. The kegs were in buckets next to the table (we had two pony kegs of local microbrews), and the non-alcoholic drinks were in a steel bucket on the ground next to the table as well.
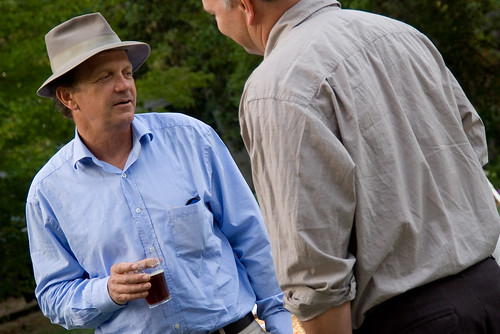 For our extra drink we made vodka spiked sangria. All of our friends are big sangria drinkers so we knew it would go over well. Plus it's incredible easy to make. We threw several of the big juice bottles from Trader Joe's into a punch bowl with boxed wine, several glugs of vodka, and some frozen fruit. There was no particular science to it. One of my brideswomen made it pre-ceremony by tasting it as she went along until it seemed right. I did do some research before buying the boxed wine to find the good stuff.
 For non-alocholic drinks we accompanied my mom and her CostCo card to CostCo to buy bulk Mexican Cokes, sparkling water, and Izze sparkling juices.
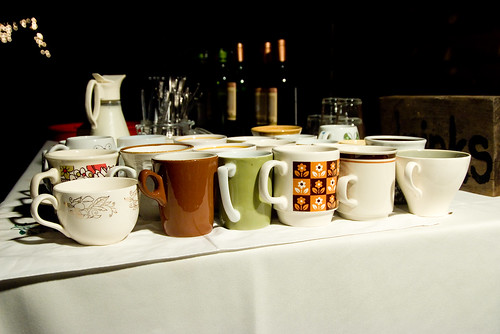 We also did regular and decaf coffee with dinner which we made in two regular drip coffee makers (my parent's and a borrowed one) and then put in the pretty press pots seen in the far corner of the picture below.
 You can see in this picture that we had a box under the table for people to put empties in for later recycling. For the most part people were good about keeping the table clean, putting empty bottles down below, and generally keeping things nice.
 Any other questions about drinks? Let me know!
Tuesday, February 24, 2009
I ran out of things to talk about!
If anyone has questions, I'll write up more posts to answer them. And I might occasionally post about friend's weddings or other things I think up. But I'm really not sure what else to write about.
But, you are more than welcome to head on over to my regular blog to see what I'm up to.
But, you are more than welcome to head on over to my regular blog to see what I'm up to.
Subscribe to:
Posts (Atom)