Showing posts with label diy. Show all posts

Sunday, February 21, 2010

Reader Question: The Fascinator


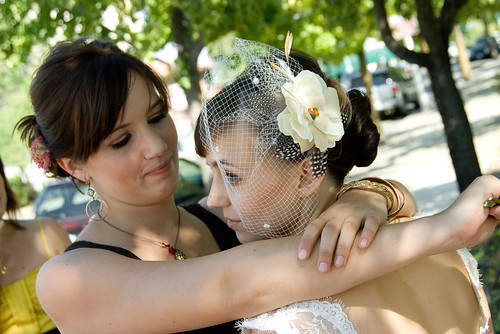
Reader Question: My question for you is specifically about your fascinator flower and veil. I love it! I'd seen and saved the image months ago but could never find where it was from. Did you make it/buy it? Do you have any advice about how I could make or buy the same?

---------

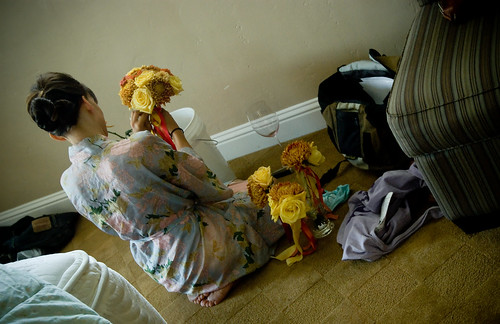
I made my fascinator and intended to do a tutorial ages ago, but after attempts to make fascinators for a few friends I realized I couldn't recreate what I did well enough to feel comfortable sharing my methods. But, with the help of a few other tutorials, I'm going to do a quick write up of what I did here.

To start with, this tutorial seems pretty good, as does this one. If what I'm writing makes no sense, maybe try one of those?

Both are similar to what I did, in that i started with a felt base (mine was two layers glued together). I then glued my first layer of feathers down and waited for them to dry, then my second layer of feathers and let them dry.

For the flower I took apart a fake flower I liked the shape of and used it as a template to cut out new "petals" from raw silk I owned (you could just use a pre-made flower, but I liked the color/texture of the silk I had). I sewed and used a tiny bit of glue to attach the longer feathers to the center of the flower, and then sewed the stones I used (they were actually stone beads) through the center of the petals to stick them all together. I wrapped ribbon around the top of a hair comb and sewed that to the felt on the bottom of the fascinator.
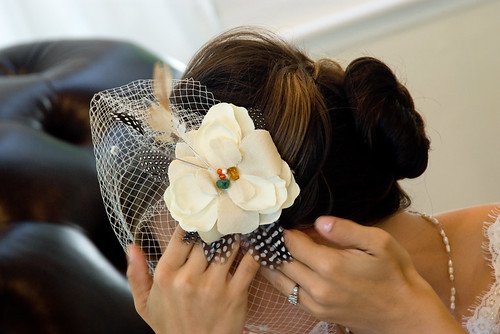

The veil was actually entirely separate. For that I removed a piece of vintage veiling from one of the way too many vintage hats I own. I scrunched up one side of it until I liked the shape, sewed that together with white thread, and then attached it to my hair using bobby pins!

I did base my fascinator design on the ones made by k. autumn, so she'd be a good place to start if all of this looks totally overwhelming. One of my friends had a k. autumn fascinator and loved it. I will say it might be worth trying to do it yourself first if you are on a budget. I spent a total of about $15 making mine, and I know the pre-made ones run at least $100. Hope that helps!

Friday, November 27, 2009

This would make an adorable wedding dress


One of the weddings that was most influential to me in planning my backyard wedding was that of Sarai of Sweet Sassafras. She now makes the most beautiful patterns, and one of her recent would make a darling wedding dress. In fact, I suspect that she knows it considering the styling.

Wednesday, July 22, 2009

Reader Question: Wedding Day Timeline

Reader Question: I was wondering if you could post a timeline of the days leading up to the wedding. I am especially in search of one for the wedding day.

I'll have to work on a lead-up to the wedding timeline (I have one, but I want to fiddle with it a bit so it more accurately depicts what actually happened).  So, for now, here is our wedding day timeline (including stuff other people were doing and stuff we (P and me) were doing).  I've given the timeline that we thought we'd go by and made a note if that thing actually ended up happening at a later time.

An Illustrated Wedding Day Timeline

8:00 am - Breakfast at the B&B  (Wedding party plus P & me)
9:30 am Meet at house to continue set up  -Menfolk, plus my parents and some assorted family
9:30 am Women at B&B for hair, getting ready, finishing up flowers w/photographer (we had our hair person come to us, which was just as cheap as us going there because she didn't have to pay for her stall rental).

11:00 am Prep salads & apps - Mom and assorted friends and family at the house
12:00 pm Men get ready for pictures at the house - Groomsmen plus P

1:o0 pm Meet for pictures at the B&B (Wedding party plus us)  

3:30 pm Back to house for family pictures - Us, wedding party, family
4:15 pm Set up apps & drinks in backyard and water in front - Designated friend helpers
4:30 pm People arrive, greet people - Everyone
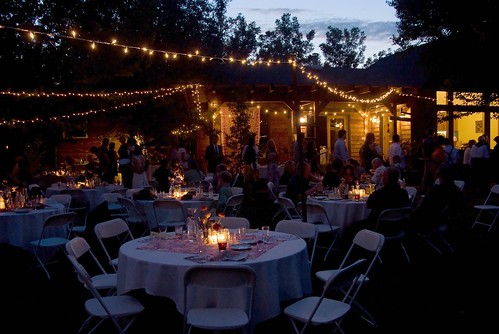
5:00 pm Ceremony starts - We based this on when we thought it would start cooling down.

6:00 pm Drinks, apps, and fun


6:45 pm Buffet starts (Actually ended up starting around 7:15 pm)

7:30 pm Cut pie (Dinner actually ended up taking longer than we thought so this actually happened around 8:30)
7:30 pm Dancing music (Actually ended up starting a bit after 8:30--immediately after cake/pie).

We wrapped up just around midnight, though most folks were gone by then and it was mostly the people were were spending the night there after about eleven or so.


Wednesday, March 11, 2009

Doing dishes

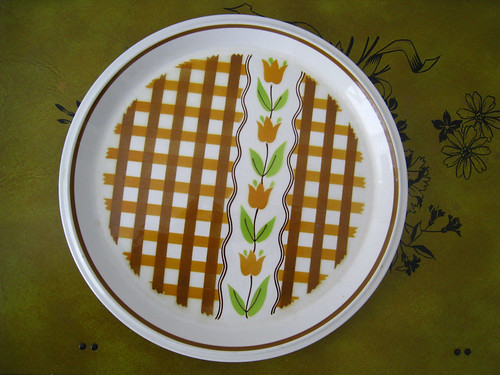
My favorite bit of wedding planning was spending weekends gathering the mismatched dishes we used for our dinner and dessert. I won't say it wasn't a ton of work, we literally spent almost a year of weekends working on it, but since Paul and I both love going thrift store and garage sale shopping, it was worth the extra effort for us.


Since we were inviting 130 or so people to the wedding, we collected enough dishes for roughly that many folks. That meant 130 dinner plates, 200 or so small plates for dessert and appetizers (we figured not everyone would take their own plate), 130 dinner forks, dessert forks, and knives, some spoons for sugar & coffee stirring, 100 or so coffee cups, and around 250 glasses for water and wine. Crazy!

Collecting the Dishes

We probably could have collected the dishes faster but we had a few rules for ourselves.

First, while we originally wanted just china, after realizing the limitations of that, we expanded our search to dishes that primarily included white, brown, green, and yellow in their patterns. We wanted things that looked vintage, so we mostly avoided things that looked like they'd been created in the last few years.

Second, we rarely bought something that cost more than it would have cost to rent that dish. So that generally meant buying things on sale. Luckily our local thrift stores have frequent sales and color tag 50% of sales daily, so we were able to do this without too much problem. If you are just doing this for aesthetic reasons, you could probably pick up your dishes much faster than if you are also doing it to help your budget. We did sell most of our dishes after the wedding so we made up some of the money that way as well.

Third, we tried to get some of the dishes on Freecycle (for free). That meant driving around town picking things up. Again, if you aren't concerned about cost, you could eliminate this and save time.

Preparing the Dishes for the Wedding

Before the wedding, we had to wash all of the dishes. This took two full days. At home, we soaked all of the dishes in big tubs on our lawn. Neighbors thought we were insane hosing off dishes on our lawn, but we found that the sooner we got the price tag stickers off the dishes, the easier it was and our kitchen was too small to unload that many dishes.

LinkOf course you can't really get dishes clean on the lawn, so after a quick rinse and removing the sticker, we would box them up. We drove all the boxes up to my parent's house (where the wedding was held) and a few weeks before the wedding we spent almost a full day running them all through their dish washer before separating them into boxes for each table. You can see pictures of the boxes piled high on the post I wrote about it.

Setting up Mismatched Dishes

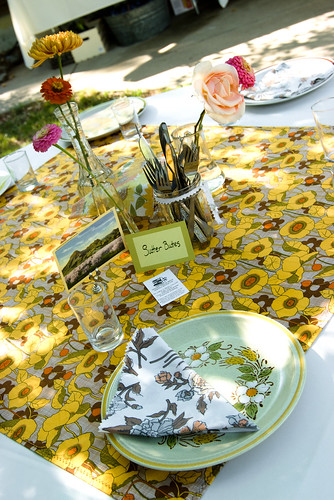
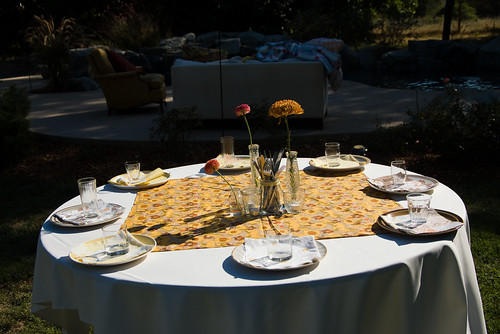
One of the challenges of using mismatched dishes is how to actually use them at the wedding. While I've seen people use one pattern at each table, we decided to mix it up more than that. But we found that it looked not as good (to us) to use both china and stoneware on one table. So we stuck with mismatched china on certain tables and mismatched stoneware on others.
I actually handpicked the specific dishes for each table based on who would be sitting there. Again, crazy.


Cleaning Up
Edit to Add: After people ate we had a few wood crates (purchased for cheap from JoAnn's Fabric), set out next to the trash cans. A few people were in the know about this ahead of time and set the tone for others to do the same. Some people left their dishes on the tables, which we just picked up the next morning during clean-up.

One of the hardest parts of doing your own dishes is that you actually have to do your own dishes after the wedding. We could have hired someone to do it, but we decided to take matters into our own hands. So on Sunday, after most people had left, we spent the afternoon rinsing off all the dishes, throwing out the broken ones, and sorting them into piles (garage sale, keep, give to friends). Honestly, we didn't wash them that well. We basically rinsed in soapy water, hosed off (yup, the hose again), and dried them in the sun.

We actually use the dishes from our wedding as our house dishes now (and we have some of our favorites of the china saved for dinner parties). It's kind of a nice, daily reminder of the wedding.

And one final note...If we had to do it over we'd rent the silverware. There are 20 knives at every thrift store for every 1 fork. And thrift store silverware isn't cheap and is often kind of gross. Also, some thrift stores package the silverware so you are forced to buy a big bag of knives to get three or four forks. Annoying!

Friday, February 27, 2009

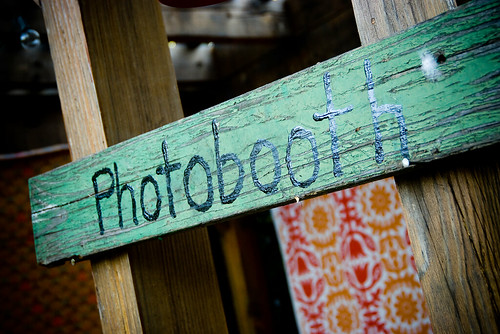
DIY: Polaroid Photobooth

Like many who have come before us, we really wanted a photobooth at our wedding. But, the cost of renting a "real" booth was far too high, so we went diy.

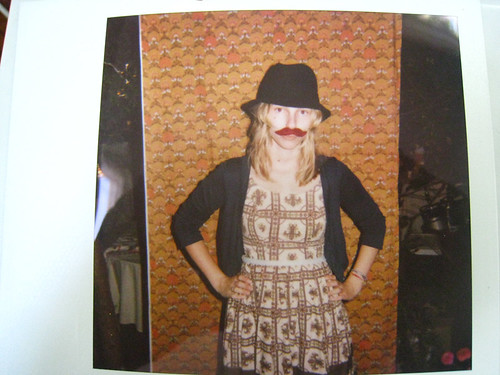
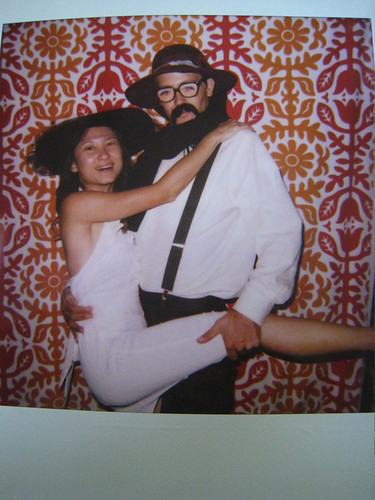
We wanted people to take pictures for us to keep, but also be able to take some home, so we decided to go the Polaroid route. We already had the camera (we found it by the side of the road, in a junk pile, right after we started dating).

Of course this came right around when they decided to take the film off the market, so the price of Polaroid film shot way up. We bought some of the film before the crisis, but we ended up scavenging eBay for most of it. All in all I believe we purchased around 200 shots worth of film for 100 people (we didn't use all of it). I've also heard that Fuji is now making Polaroid 600 film, so that should make it easier for those of you who want to try this.
While some people have a designated picture taker, we knew our friends would be all over taking Polaroids so we figured they could switch off being picture taker and model. That worked out just fine and the booth was literally full all day while people were setting up, all night, and into the next day as we were cleaning up!
To make the backdrop for the photobooth we purchased two sheets of fabric (three yards of each). One was a regular sized fabric, and the other was upholstery fabric from Ikea. I'd recommend upholstery fabric because the heavier weight hangs better and the extended width allows more people to stand in front of it.

To our advantage, we were able to just tack our fabric to my parent's deck and use their porch lights to light it. You could also make a wood frame to attach the fabric to, hang a line from trees and attach the fabric to that, or nail it to a wall.

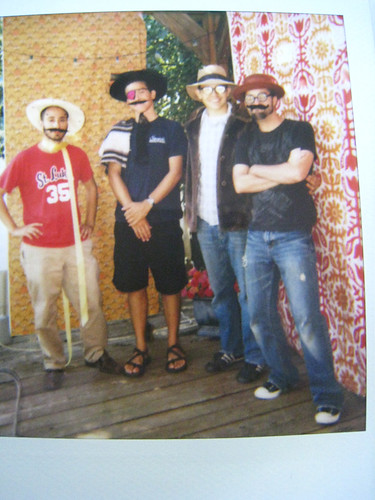
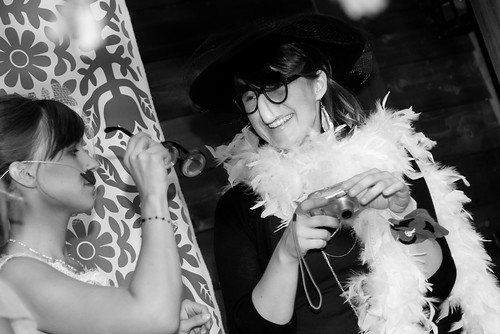
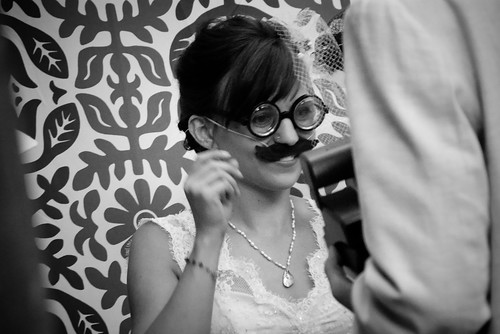
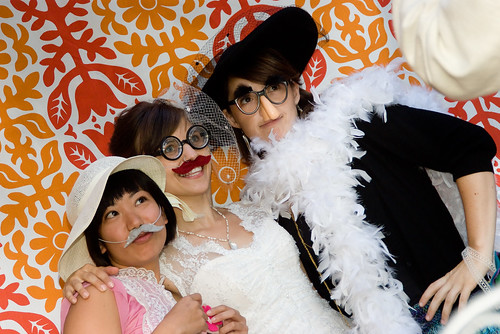
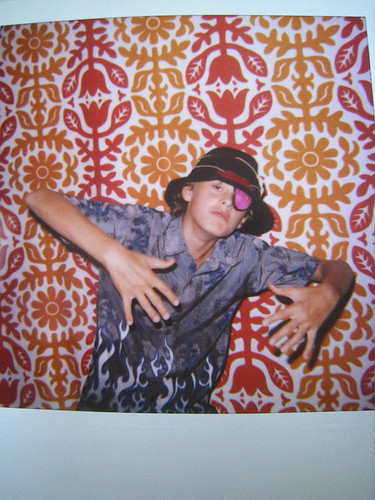
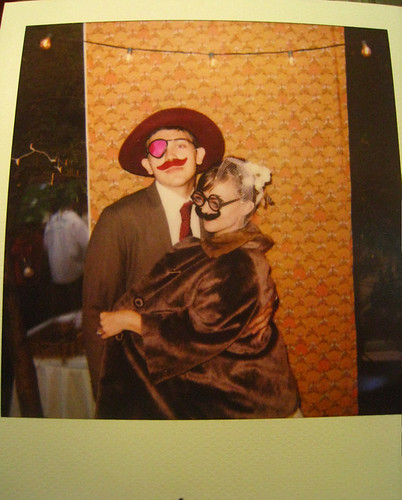
On the deck we put a table with the film, a board for people to post pictures on, and several costume items. For the costumes we used things I had lying around my house, plus a few purchased pairs of crazy $1 glasses. And yes, I have hats and fur coats and eye patches just lying around. The felt mustaches I made.

And of course, as some of these pictures exhibit, our photographer couldn't help but snap a few pictures of people using the booth as well. They loved it!

Thursday, February 26, 2009

DIY: Gocco Invitations

How did I not write about our invitations? Perhaps I blocked them out because they were so. much work. After they left my house I was happy to have them out of sight, out of mind.


Our invites were entirely designed and created by little ol' me (using purchased art...I'm not an artist!). P. bought me a gocco for my birthday so the invites were really my first project using the gocco. I highly recommend practicing a bit more before you create your invites. The gocco isn't hard to use once you get the hang of it, but we burned through several frames and lots o' ink before we figured out how to burn the screens to create clean, crisp pictures on the other side.

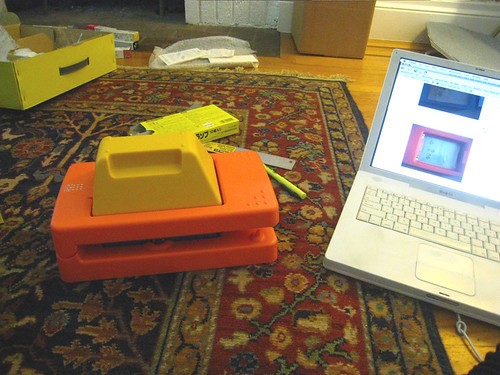
Gocco, straight out of the box, with computer tutorial.

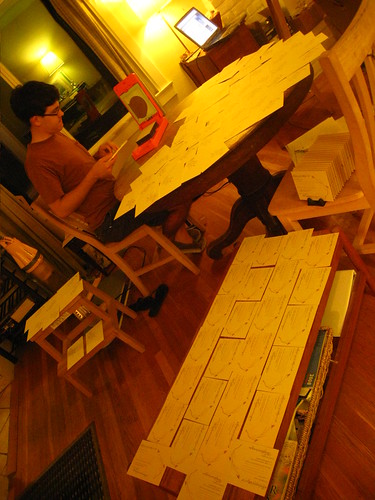
There were papers everywhere. Everywhere.

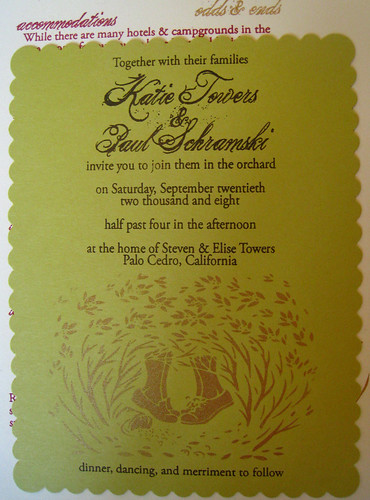
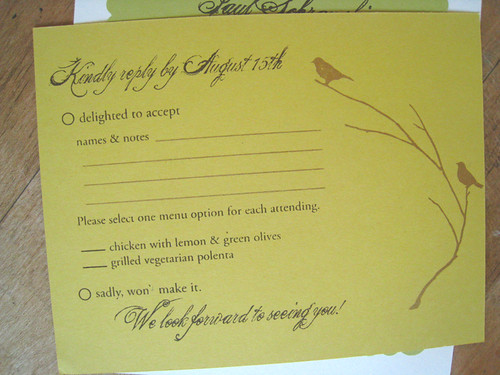
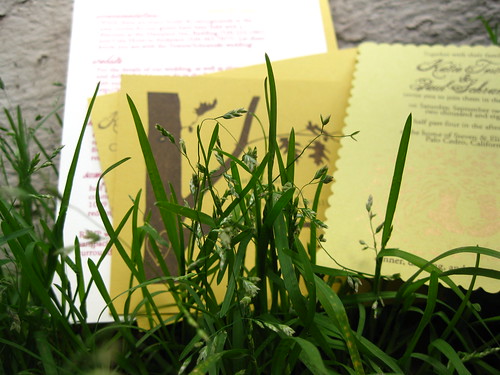
Our invitations had four components. The actual invite, the response card, an info sheet, and the envelope.This image is probably the closest to the actual color of the paper (which came from Paper Source). For the envelope I handwrote a screen using the gocco pen and then printed them so we wouldn't have to handwrite a return address on each envelope. As a sidenote, we no longer live at that address so good luck stalking me there :)

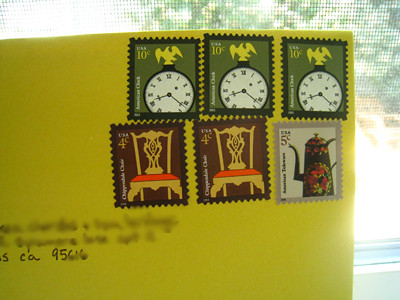
While I wanted to use vintage stamps, that ended up being a cost that I couldn't justify. My way of getting around using the flag stamps (the only stamps available when I was sending out invites), was to use a variety of smaller amount stamps. This involved running around to four post offices who looked at me like I was a crazy person for buying hundreds of 5cent stamps.

Our invitations were simple, using an image from Nikki McClure, one of my absolute favorite artists. The text is in a dark brown color, with gold ink for the image.

Our info cards used two screens: one for the image done in gold ink and another for the text, done in a raspberry color. We intended to have driving directions on the back of this sheet, but for some reason could not get the screen to print clearly so after several ruined screens we just scrapped the idea and stuck directions on the website.


You may notice that on our reply card we didn't really make it clear that people should still write their name if they weren't planning on attending. Several people responded with "no" responses and no names. We had to guess based on postage and process of elimination who those people were. Kind of a pain.

So all in all I really liked how they turned out. They aren't professional. They aren't letter pressed. But they were fairly cheap. For save the dates, all the gocco supplies, paper, and stamps we spent a total of $310.

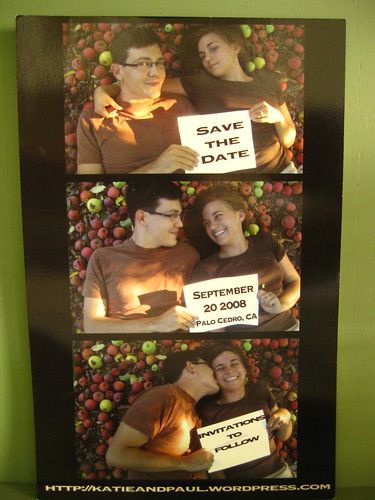
And, since I'm sure someone will ask, here is our save the date. We made my sister take the pictures of us lying under my parent's apple trees holding blank pieces of paper, but wouldn't tell her why. She thought we were crazy. I added in the text after the fact. We printed them using VistaPrint, with a discount code, and I think we paid around $15 total.


Thanks for all the questions! Keep them coming!
Wednesday, February 4, 2009

DIY: Making Mason Jar Lamps

Several people have asked how we created the mason jar candle holders. While I don't have the tools here to do a good step-by-step with pictures, here's what I've got using one of the already made holders.

Tools:
-Empty jars with labels removed
-Sand
-Tealights
-Wire (I *think* the wire we used was mostly 20 gage...we found two different spools of wire in my parent's garage, so we used that.)
-Wire cutters or planting sheers (something that will cut through the wire you have).
-Needlenose pliers

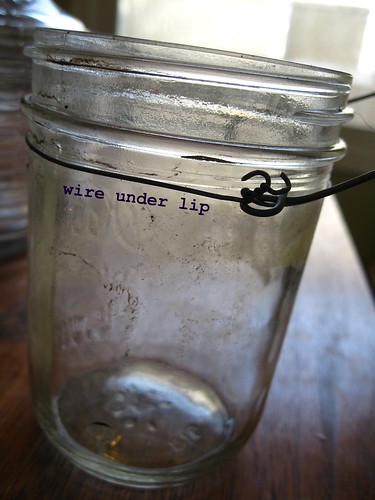
1. Wrap the wire around the jar, under the lip, leaving about an inch of slack in the wire and cut.
2. Twist the wire together to close the loop, but still make sure that the wire is a bit slack.

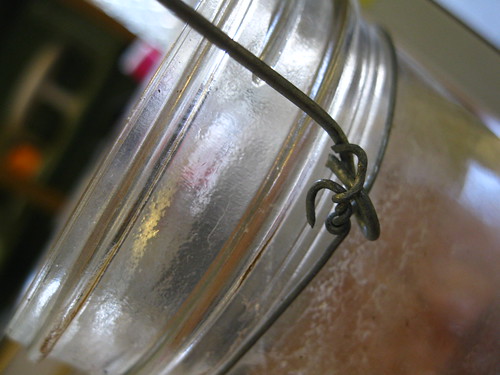
3. Cut another length of wire to use as the "hanger." Mine were all around a foot long, maybe a bit longer. We did different lengths so they'd hang at different levels. Bend the wire into a big "u" shape.

4. Twist the ends of the hanger wire so that they form a "u" facing out. The pictures show the ends closed already. I felt like having the hooks face out made them more securely attached to the lip wire, but maybe I was being crazy.

4. Hook the hanger wire onto the wire around the lip of the jar (this can be slightly tricky if you don't leave enough slack in the wire around the jar).

5. Tighten the lip wire by twisting it more with the pliers until it feels securely on there.
6. Close the hooks on the hanger wire with the pliers (the pictures show this step already done).

7. Fill with about an inch of sand and stick in a candle!

Let me know what questions you have. We used one of the long lighters to light everything so we could put the candles in ahead of time, but if you don't want to buy one of those you could just stick the candles in as you light them at the wedding.

Tuesday, January 20, 2009

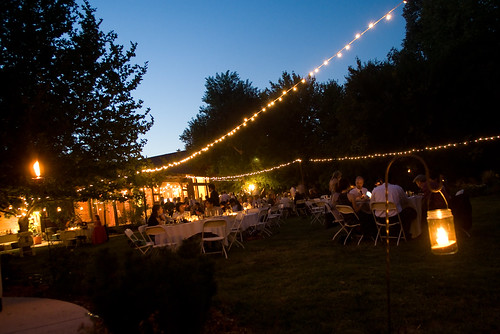
Details: Creating an outdoor seating area

Paul and I had a very lazy weekend. He's been busy lately so he swore off work for all of Saturday AND Sunday. No work emails, no checking his blackberry, nothing. I was pretty impressed that he pulled it off. We spent the time going on a hike, cooking semi-elaborate meals, having friends over, and other odds and ends.

None of that is at all relevant to what I'm about to post, except for to say, that I've had a good excuse for not posting in a few days!

So one of the things that I knew I wanted at our wedding was an outdoor seating area. Couches, floor pillows, a fire pit, the works. Since our wedding was in my parent's yard, they offered to let me drag their living room furniture outside. Have I mentioned that I love how flexible my parents are?

I was given a Crate & Barrel gift card from my old office as an early wedding present, so I used that to buy a rug and some floor pillows that I knew we'd reuse in our house. And I lugged up a big chair I love, because I thought it would look cute in pictures (and I'm going to admit that is a crazy reason to bring a hundred pound chair anywhere).


We set the lounge up on the pool deck, which was located just close enough to the dance floor to be a good place to take a break and people watch, but just far enough away from the DJ to carry on a conversation.
After dark we lit torches all around the patio and floating candles in the pool, got the fire pit going, and people sat around on the couches and curled up in quilts on the rug. One of the great mysteries of our wedding is how there isn't a single picture of it! I've put out a request to my friends in hope someone has one that they've been hiding from me, so if something shows up I'll be sure and post it here.

Having the seating area was a great, super easy addition to the wedding (particularly since we could use stuff we already had on site). People don't really want to sit at tables after they are done eating, and it gave them somewhere to be if they didn't want to dance. I have no idea how much this would cost, but I was at a wedding recently where they primarily rented couches instead of tables and chairs. They did have a few tables for those who needed or wanted them, but in general it was perfectly fine, and a lot more comfortable for seating once people were done with their food.

My brother-in-law & his girlfriend at the couch-seating wedding.

Monday, January 12, 2009

Details: Food (yum!)

I've been so unmotivated to post the last few days that I've actually had this post written and just didn't log in to stick in the pictures and hit the post button! But I have a few posts half written and the husband is out of town this week, so I'm sure I'll be posting more than usual.

Before the wedding we went back and forth about having our wedding catered versus doing it ourselves. I know many, many people who love to cook (myself included) so I knew that we could pull off a home cooked meal. However, I wanted my parents to be able to enjoy some of our wedding reception. And since the wedding was at their house, I knew if all the food was on them, they would be occupied a whole lot more than they needed to be.

Our compromise was to have the main dish done by a caterer while a group of us did the appetizers and sides ourselves. Finding a caterer to do that was actually much easier than I thought it would be. There aren't many caterers in Redding, so we ended up going with Roots Catering, out of Chico, CA. They use local foods as much as possible, they are family run, and they were cheap.

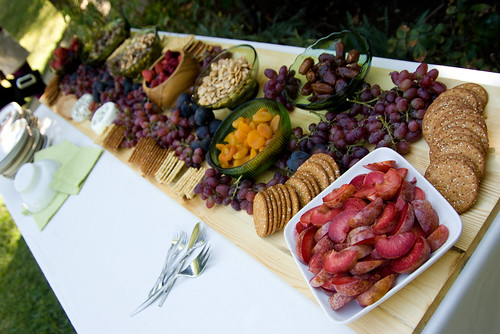
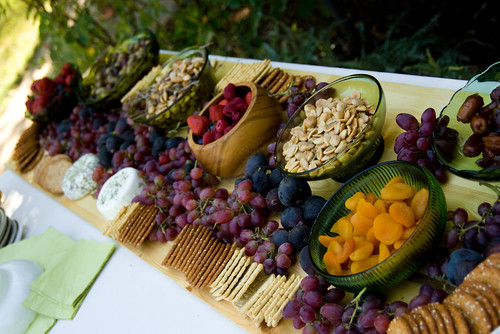
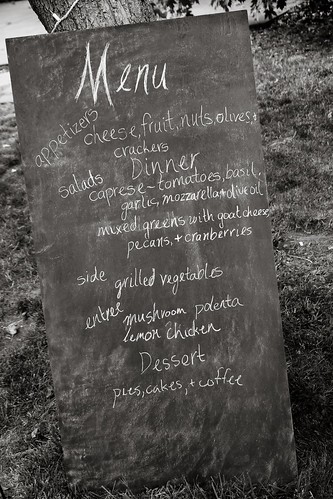
For appetizers we decided to go relatively simple. I ordered goat cheese from a local goat farm, we bought fruit from a farm stand near my parent's house, and crackers, nuts, olives, and dried fruit from Trader Joe's. I roasted some of the almonds with sugar and lavender, but everything else was just as we bought it. The day before the wedding we put most of the food in the bowls and covered them for the night. And right before the ceremony, my younger sister and mom set everything up on the table in just a few minutes. It was plenty of food, easy to do, and cheap.

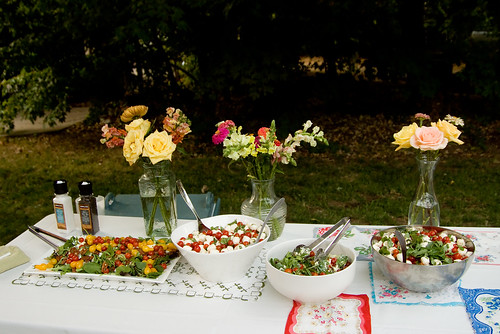
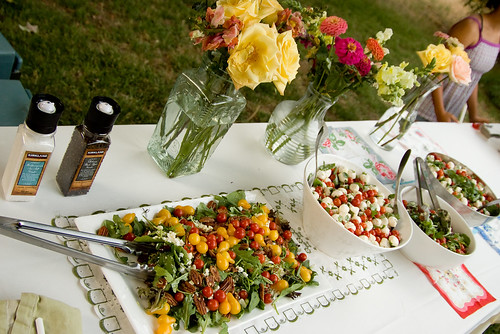
For dinner, we had our caterers do two simple main dishes--Mediterranean chicken and mushroom polenta--and then a side of grilled vegetables. Again, we wanted to do something quick and easy to prepare, so the two salads we made were a caprese salad and a simple mixed green salad.

For the caprese we combined cherry tomatoes in a variety of colors from the same farm stand as the fruit (she gave us a deal for buying several flats of them), the small mozzarella balls from Trader Joe's (no need to even cut them up!), basil from my parent's garden, chopped garlic, and olive oil.

The green salad was going to just be mixed greens, pecans, dried cranberries, and goat cheese with olive oil, balsamic vinegar, and lemon juice over the top, but in throwing everything together in the kitchen, some tomatoes were put in too.

The salads were prepared by my mom, with help from my sister, and my best friend's mom and sister. I think it took them about twenty minutes to put them together (most of that was spent realizing they couldn't find the dishes I'd set out to put them in and scrambling through my parent's kitchen to find bowls).


We also purchased bread from Trader Joe's and served that with butter that my little sister obsessively pre-sliced for people.

In total we spent $1700 on food ($17/person) for excellent, mostly local, organic food. From what I priced other caterers in California to be, I think that's a pretty good deal. The caterer charged us $10/person for what they did (including tip), and our food came out to $700 total. And we did have a ton of food leftover, including about $100 worth of goat cheese that we happily ate for about a month afterward and enough dried fruit that we are still working on it.

Some things that made doing our own food easier included:

-Being flexible. We showed up at the farm stand on Thursday before the wedding and basically bought the fruit and veggies they had. That saved us money and we were able to support a local business.
-Using Trader Joe's. I originally wanted only local food. When I realized that it was going to be cost prohibitive, I settled for Trader Joe's organic. Which isn't really a bad thing to settle for all things considered.
-Not doing anything too crazy. Originally we wanted to make this awesome corn salad, but after thinking about how much work it would be, went with the caprese salad. And nobody missed the corn salad they didn't know they'd missed! Doing simple food for appetizers was also a huge time saver. The most complicated thing we did for that was to cut up the plums.
-Setting up all the dishes ahead of time. I made a box for each portion of the meal (salads, bread, appetizers, etc), with all the serving dishes and utensils in it and directions for each dish. Although the salad box apparently went missing, in general the system worked and I didn't have to worry about setting anything up on my wedding day.

Let me know if you have questions about the food or doing your own food for the wedding. It was a great experience for us, and I'm really happy with the way it all turned out. I'd do it again in a heartbeat.

Friday, January 9, 2009

Wedding Recap: Dinner & Dessert

On our budget, a day of coordinator wasn't going to happen. Our dj was also a friend of ours, and while he's a great dj, didn't also want to play MC and boss everyone around. That meant that once the reception started, things happened when they happened. No dinner exactly at six or cake cutting at seven on the dot. Things just happened.

I'm going to do a detailed food post later, but our dinner was a combination of do it yourself and a very flexible caterer.
At one point before dinner I walked into my parent's kitchen and found my mom, my sister, my best friend/brideswoman, her mom, and her sister all making salads. While some of you are probably thinking that I shouldn't have had to go in the kitchen, that we all should have been out enjoying the party, I promise that all of these women were more than happy to take a few minutes for the sake of salad. We had a strict, nobody is obligated to help, but we know we have enough friends who will want something to do to make it work, policy.

We served dinner buffet style. There was some attempt to have people go by table, but as soon as people saw the buffet line, they were in it. Unfortunately, that meant that people at the same table, didn't necessarily have their food at the same time, and didn't necessarily eat together.


Although part of the joy of having a very casual wedding was that people who showed up to an empty table just went and sat with another group. Problem solved!

I had no sense of time all day, so I'm not actually sure how long dinner took. I do know, based on our iPod playlists, that we ran out of our two hour and twenty minutes of music (from the end of the ceremony) sometime around the middle-end of dinner. One of our friends ran up and stuck his iPod in for the rest of dinner so our dj could finish eating. I wouldn't have realized that happened except that he was sitting at my table. People are stealthily helpful.

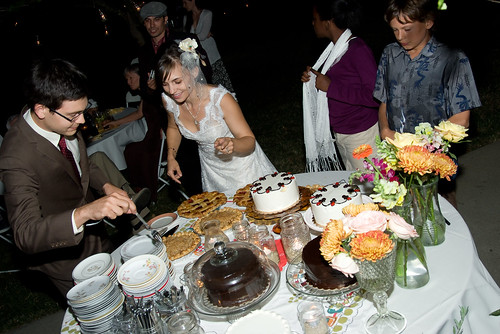
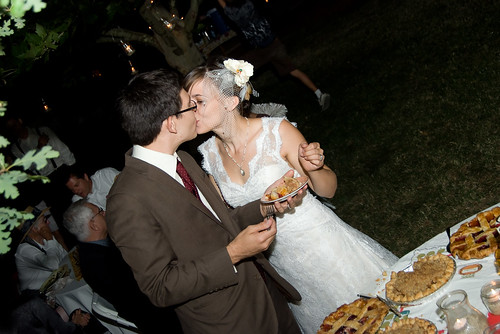
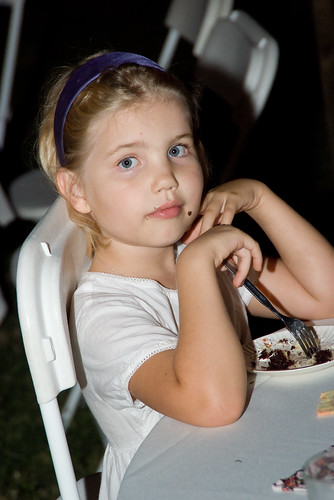
In planning the wedding, P. and I had decided that we wouldn't make a big deal about cutting the cake and pie we had for dessert. But since we'd both been busy mingling for most of the reception to that point, and it felt like we hadn't even really seen each other, we decided to cut the pie together instead of just having the caterer do it. We didn't really make (or even encourage) people to watch us, though it ended up happening a bit. The kids at our wedding were particularly interested in the whole bit--mostly because they were trying to scope out the different flavors we had available.

Since our dinner playlist (that I'd carefully selected to end with dessert music) was long since gone, our friend switched up his iPod to Devotchka for pie cutting & dessert. I highly recommend Devotchka for cake/pie cutting music. I can't tell you how many people came up to us to ask who it was (or if it was Devotchka). Even our photographer was excited. And if you don't know who Devotchka is--for shame! Go listen now!

Since we'd had our pie first, while people were finishing up their dessert, we got the dancing started.

Up next in recaps: Break dancing, I get down on the ground, my dress gets tied in a knot, and other legit and non-legit behavior...